


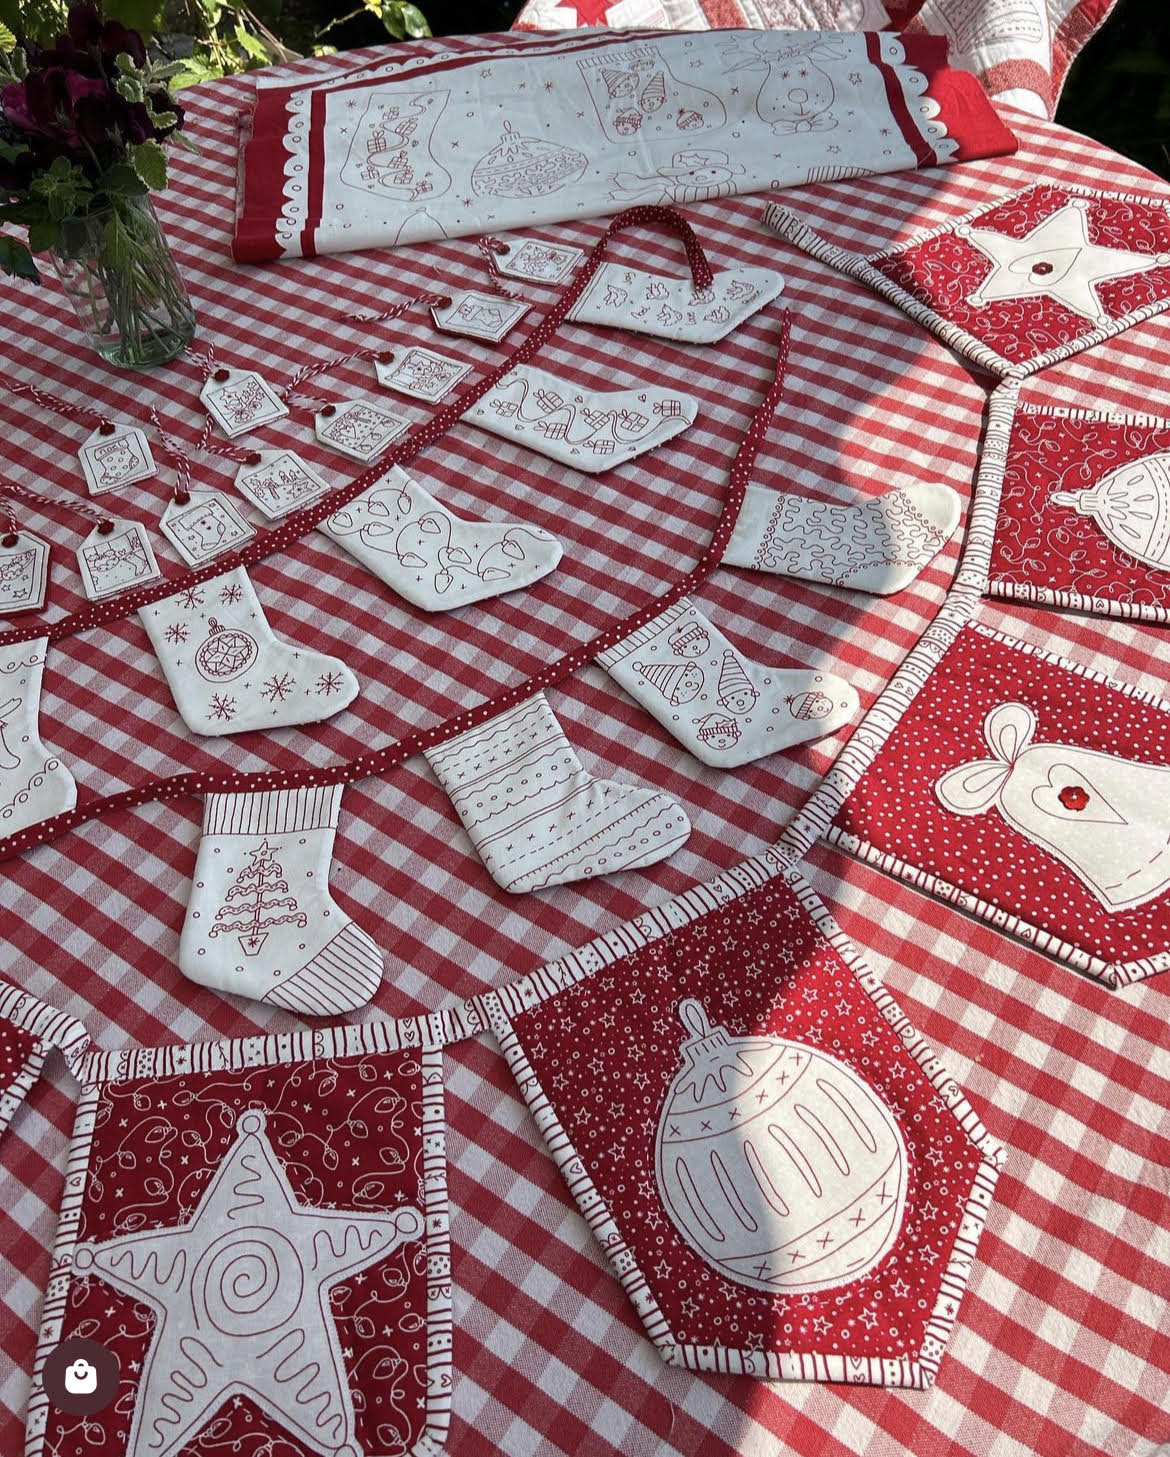
Mandy Shaw has created a beautiful Redwork Christmas range for this year which includes two panels. The first is a stocking lap quilt that comes pre-printed where you can quilt on the lines or even highlight the redwork designs with red perle.
The second panel is her bunting panel, suitable for many Christmas Projects. Mandy Shaw suggests using each image to applique onto a background fabric to make bunting. Then using the stockings as stocking shaped bunting garland. Of course the images can be cut and appliqued onto backgrounds to make cushions, bags, a quilt or even a Christmas Garland, there’s just so many ideas!
We have put some fabric packs together which include fabric, panels, bunting tape & ric rac for you to make both the stocking & ornament garlands.
Here are some instructions to help you:
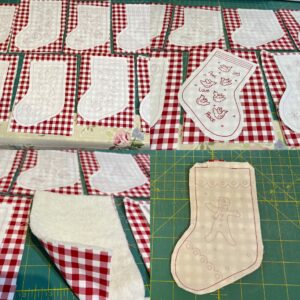
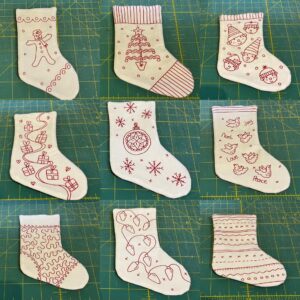
Stocking Bunting: Cut out all the stockings from the bunting panel 1/4″ outside of their outer line. You will need approximately 30cm x 110cm of a backing fabric & wadding. With the wadding on the bottom, lay the backing fabric wrong side against the wadding (we used an assortment of Redwork Christmas fabrics), then lay the cut out stockings right side down on top of the backing fabric. Pin in place and sew the sides but not the top of each stocking (you will be able to see the outside line to stitch on from the wrong side of the fabric). Cut out each stocking leaving a 1/4″ seam, then turn right side out and press.
Work out the centre of your bunting tape, then insert a stocking so that the raw edge is enclosed when you fold the bunting tape in half lengthwise. Pin in place, then work out what distance you want to place each stocking, pining in place as you go. Stitch them into place with a red thread, along the length of the bunting tape close to the edge making sure you catch the back of the folded bunting tape as you go. Lay the ric rac over the top of the bunting tape and stitch in place using a cotton to match the ric rac. Create a loop on each end for hanging.
Ornament Garland: Cut out eighteen 9″ wide x 10″ long red fabrics from the Redwork Christmas range. Cut out nine pieces of fusible wadding 9″ x 10″. Iron a piece of red fabric to the front and back of each piece of wadding, then set aside.
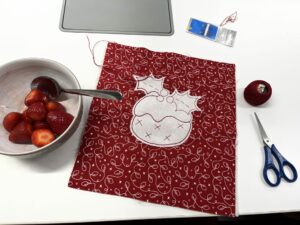
Iron bondaweb onto the wrong side of each ornament design from the panel, then cut them out allowing 1/4″ away from the design. Peel the paper off the back & position each ornament in the centre of the 9″ wide x 10″ long red fabric/wadding piece (on one side only). Iron in place. Decorate as desired using a machine or hand, cotton thread or embroidery thread & embellish as desired.
On the two 10″ sides of the flag, measure down 7″ from the top & mark this position. Along the bottom of the flag, find the centre. Now cut from the 7″ mark on one side, to the bottom centre point. Now cut from the from the 7″ mark on the other side, to the bottom centre point so that you create an pointy garland flag.
From the stripy red & white fabric, cut 11 strips of fabric 2 1/2″ wide creating long strips. Take one strip and iron it in half lengthwise with wrong sides together. Now you are going to bind the sides of the flag like you would a quilt. Take a flag & starting on the top of the right hand side, position the stripy tape you’ve made so the raw edges of tape line up with the raw edge of the right hand side of the flag. Stitch using 1/4″ seam away from the raw edge, but stop at the corner. Make a little fold in the tape then start sewing down the next straight bit, but stop again at the point. Fold the tape back at 45 degrees away in the opposite direction you need to go in, then creating a fold that sits on the edge of the flag as you fold the tape forward again, laying it on the next straight bit & start stitching until you get to the next corner. Make a little fold in the tape again, then carry on stitching until you get to the top of the left hand side (do not stitch it on the top). Repeat this for all 9 flags. Fold the folded edge of the binding around to the back of each flag & hand stitch down in place.
Take the left over strips of stripy fabric & stitch them together end to end so you have a length of approx 4m. Iron in half with wrong sides together. Starting at the centre point of the long folded strip, position the centre of the strip on the centre point of the top of one flag, with raw edges of the strip matching the raw edges of the top of the flag, pin in place. Work out how far you want to space the flags apart & repeat the process pinning each one in place. Stitch in place using a 1/4″ seam from the raw edge. Fold the folded edge of the binding strip over to the back of the flags & hand stitch down. Finish off each end with a loop & maybe a button.
Hang up and enjoy!