Posted on

A Little History of Feed Sack Sewing

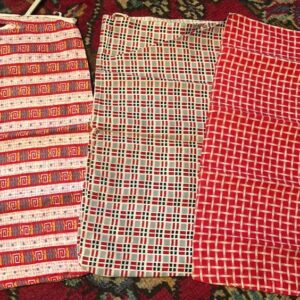
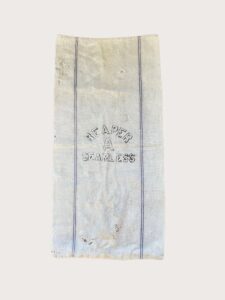
Since I first heard the term Feed Sack fabric, I was intrigued. As I child I helped out on a farm and feed sacks to me meant rough and ready hessian sacks that I could never imagine using to make an item of clothing or a quilt. Then I discovered the gorgeous cotton prints of 1930s American feed sacks and things fell into place.
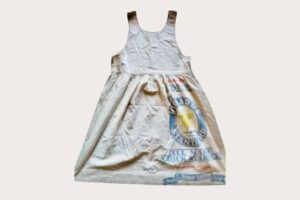


I read up on the history and found that out of necessity every scrap of fabric that could be repurposed was used. From the 1840s grains, animal feed, sugar, flour, beans and seeds etc were all packaged in cotton bags. Once emptied the bags were washed and used to make all manner of clothes and household items like aprons and quilts. In the 1920s, the cotton bags were made from softer fabric and manufacturers started to print water soluble labels and sewing patterns on their sacks to encourage the practice and make life easier for the home sewer.


During the Great Depression of 1929-1939, the repurposing of feed sacks became even more prolific. Many people were living hand to mouth and the only way of clothing themselves or keeping warm was to make clothes and quilts from the free fabric that came in the shape of the bag. A 100lb feed sack could be opened to create a yard of 44″ fabric–enough for a child’s dress, and about 3 pieces made an adult size garment.
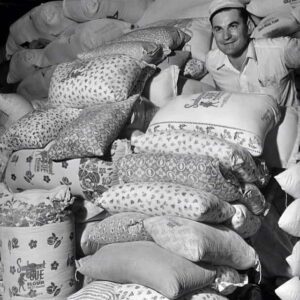
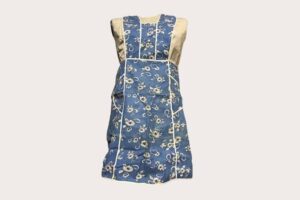


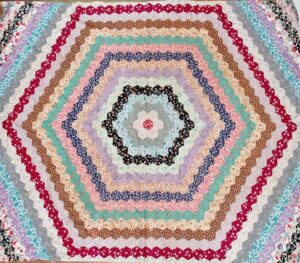
In the 30s competition became more fierce as manufacturers vied to produce the most attractive prints to entice women to choose their product. The 40s were the heyday of feed sack sewing due to the shortages of WW2. There were competitions to encourage the use of every tiny scrap of fabric and so we see lots of scrappy quilts made at this time and the popularity of the postage stamp quilt made from inch squares of fabrics.
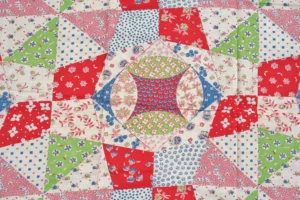
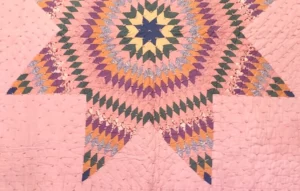
When we think of feed sacks we cannot imagine how colourful some of them were but looking at photos we can see that the vibrant feedsack inspired fabrics of today are true to the originals.
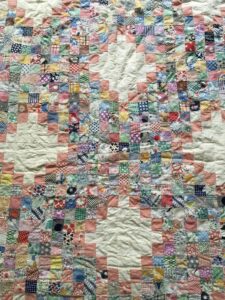
There is plenty of information available online on this fascinating subject, some of which can be found HERE and HERE

Posted on

Mandy Shaw’s Redwork Christmas Bunting Panel

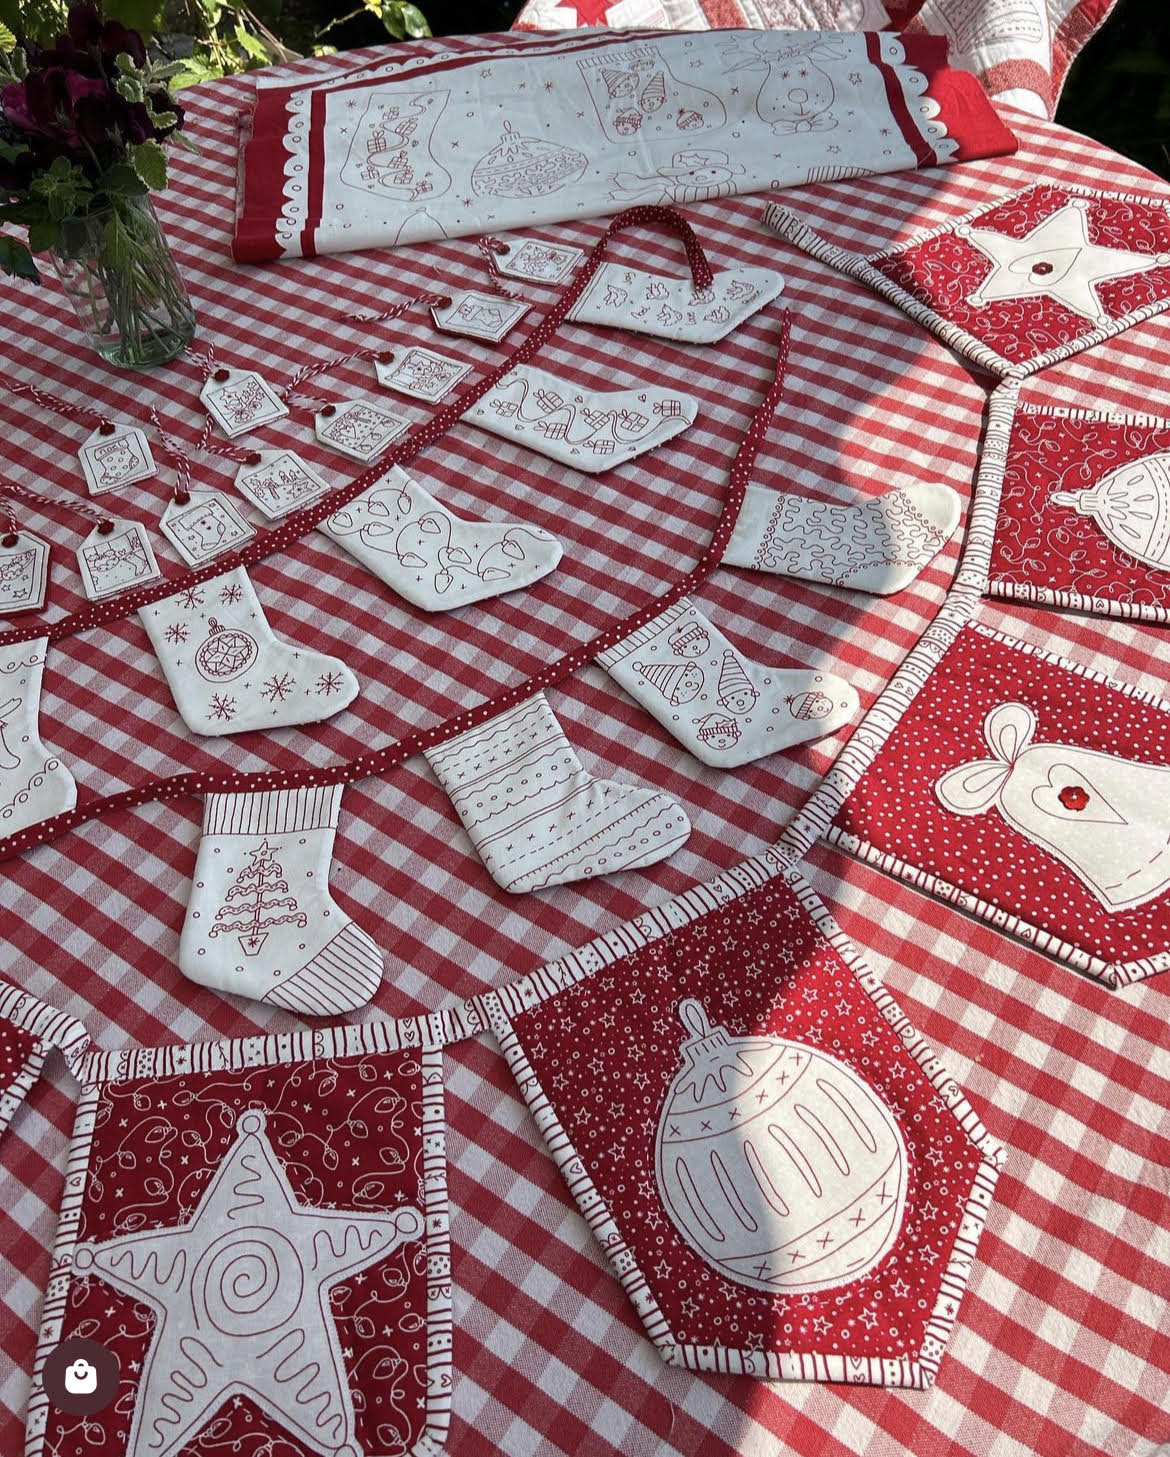
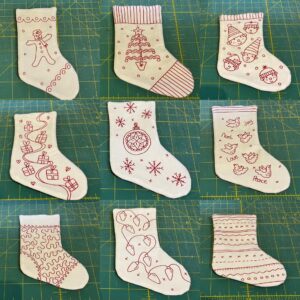
Mandy Shaw has created a beautiful Redwork Christmas range for this year which includes two panels. The first is a stocking lap quilt that comes pre-printed where you can quilt on the lines or even highlight the redwork designs with red perle.

The second panel is her bunting panel, suitable for many Christmas Projects. Mandy Shaw suggests using each image to applique onto a background fabric to make bunting. Then using the stockings as stocking shaped bunting garland. Of course the images can be cut and appliqued onto backgrounds to make cushions, bags, a quilt or even a Christmas Garland, there’s just so many ideas!

We have put some fabric packs together which include fabric, panels, bunting tape & ric rac for you to make both the stocking & ornament garlands.

Here are some instructions to help you:
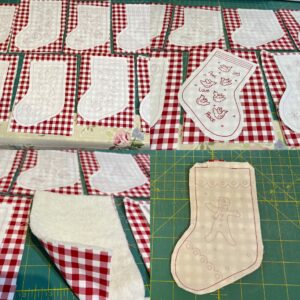
Stocking Bunting: Cut out all the stockings from the bunting panel 1/4″ outside of their outer line. You will need approximately 30cm x 110cm of a backing fabric & wadding.  With the wadding on the bottom, lay the backing fabric wrong side against the wadding (we used an assortment of Redwork Christmas fabrics), then lay the cut out stockings right side down on top of the backing fabric.  Pin in place and sew the sides but not the top of each stocking (you will be able to see the outside line to stitch on from the wrong side of the fabric).  Cut out each stocking leaving a 1/4″ seam, then turn right side out and press.
Work out the centre of your bunting tape, then insert a stocking so that the raw edge is enclosed when you fold the bunting tape in half lengthwise.  Pin in place, then work out what distance you want to place each stocking, pining in place as you go.  Stitch them into place with a red thread, along the length of the bunting tape close to the edge making sure you catch the back of the folded bunting tape as you go.  Lay the ric rac over the top of the bunting tape and stitch in place using a cotton to match the ric rac.  Create a loop on each end for hanging.

Ornament Garland:   Cut out eighteen 9″ wide x 10″ long red fabrics from the Redwork Christmas range.  Cut out nine pieces of fusible wadding 9″ x 10″.  Iron a piece of red fabric to the front and back of each piece of wadding, then set aside.

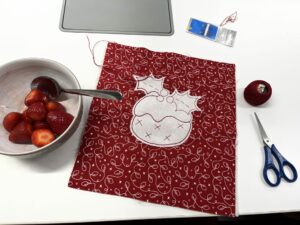
Iron bondaweb onto the wrong side of each ornament design from the panel, then cut them out allowing 1/4″ away from the design.  Peel the paper off the back & position each ornament in the centre of the 9″ wide x 10″ long red fabric/wadding piece (on one side only).  Iron in place.  Decorate as desired using a machine or hand, cotton thread or embroidery thread & embellish as desired.
On the two 10″ sides of the flag, measure down 7″ from the top & mark this position.  Along the bottom of the flag, find the centre.  Now cut from the 7″ mark on one side, to the bottom centre point. Now cut from the from the 7″ mark on the other side, to the bottom centre point so that you create an pointy garland flag.
From the stripy red & white fabric, cut 11 strips of fabric 2 1/2″ wide creating long strips. Take one strip and iron it in half lengthwise with wrong sides together.  Now you are going to bind the sides of the flag like you would a quilt.  Take a flag & starting on the top of the right hand side, position the stripy tape you’ve made so the raw edges of tape line up with the raw edge of the right hand side of the flag.  Stitch using 1/4″ seam away from the raw edge, but stop at the corner.  Make a little fold in the tape then start sewing down the next straight bit, but stop again at the point.  Fold the tape back at 45 degrees away in the opposite direction you need to go in, then creating a fold that sits on the edge of the flag as you fold the tape forward again, laying it on the next straight bit & start stitching until you get to the next corner.  Make a little fold in the tape again, then carry on stitching until you get to the top of the left hand side (do not stitch it on the top).  Repeat this for all 9 flags.  Fold the folded edge of the binding around to the back of each flag & hand stitch down in place.
Take the left over strips of stripy fabric & stitch them together end to end so you have a length of approx 4m.  Iron in half with wrong sides together.  Starting at the centre point of the long folded strip, position the centre of the strip on the centre point of the top of one flag, with raw edges of the strip matching the raw edges of the top of the flag, pin in place.  Work out how far you want to space the flags apart & repeat the process pinning each one in place.  Stitch in place using a 1/4″ seam from the raw edge.  Fold the folded edge of the binding strip over to the back of the flags & hand stitch down.  Finish off each end with a loop & maybe a button.

Hang up and enjoy!

Posted on

Mary’s Show n Tell

Our Mary is an exceptionally talented needle woman, and has designed so many beautiful patterns which we’ve run as classes, and sold as patterns and kits, & you can see a few of them here.


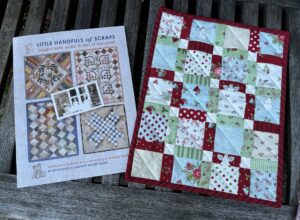
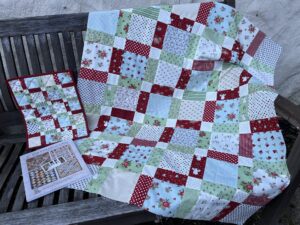
Mary used the Sophie mini quilt pattern in the book Little Handfuls of Scraps by Edyta Sitar as inspiration for these two matching quilts. One each for a child and their favourite toy.

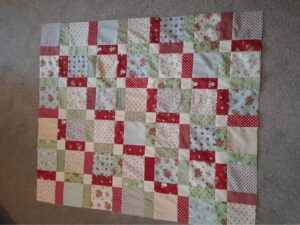
The original uses scraps or a mini charm, and for the larger one Mary used 5″ Charm Squares instead. For these examples she used the I Believe in Angels fabric range. The Mini Charm pack for the mini quilt and two charm packs for the bigger quilt. For the lap quilt Mary followed the original pattern but using the bigger squares and added some extra rows to make the larger size. Look at the quilt top photos to see the layout she used and number of rows needed.


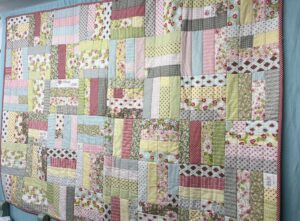
Mary made this gorgeous quilt using Brenda Riddle fabrics a few years ago that started as a Jelly Roll Race, but ended up as an alternative version of Rail Fence. It has little additions of small embroidered “heart felt sayings” on squares dotted throughout this pretty quilt, that were taken from an old magazine Vingette by Leanne Beasley.

We think it would look beautiful in Brenda’s latest fabrics which are called Grace.

Rail Fence Quilt


One of Mary’s beautifully designed kits is this Care, Share, Dream Rotary Wrap made from Le Beau Papillon French General fabrics, perfect for carrying your rotary cutters, etc., with purpose made pockets inside.

Care Share Dream

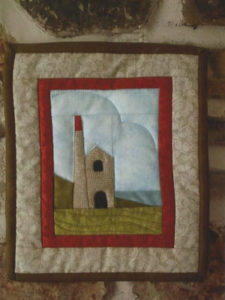
There’s nothing more iconic here in Cornwall than a Mining Engine House perched high on the cliffs, & Mary’s foundation pieced pattern Poldark reminds us of this.
Mary’s kit been made by so many of our customers, who have sent them all over the world to friends and family to remind them of home.

Poldark Country Kit & pattern


Posted on

The Mermaid of Zennor

One fine Sunday morning in Zennor church, perched on the cliffs of Penwith, the choir and congregation were ready for service when through the church door came a strange lady of unearthly beauty.  Her green eyes looked back calmly at the villagers, who were staring, for newcomers were rare in that far-flung parish; her tawny-gold hair flowed down over her back, wild and untrained; the long dress she wore swept the ground like a bride’s train, and was made of some material that no one there had ever seen, for it shimmered like the sea on a sunny day.  She sat near the door in a pew on her own, away from other people.

In the choir were some fine singers, but none finer than Mathy Trewhella, a handsome young man who sang a clear high tenor:  his voice could be heard all over Zennor Churchtown when he wished.  As the choristers sang their hymns and psalms Mathy became aware of the stranger staring at him with those emerald-green mysterious eyes; when he looked at her it seemed to him that a queer faint smile hovered on her face.  After the service she was the first to leave the church, and those who went out after her thought it strange how rapidly she had disappeared, as they could not see her anywhere outside.

Five or six times this unknown lady came to Zennor church, always on a fine day, and always she sat far apart from the congregation, watching Mathy and listening to every note he sang.  Her eyes seemed to look right through him, and her gaze somehow reminded him of the dim light in caves under sea.  He determined that somehow he would find out who she was.

The next time she appeared in church he was ready.  Before the end of the service, as the parson gave the benediction, Mathy slipped from the choir stalls and let himself out of the little side door of the church.  And so, as soon as the lady emerged, first as usual from the main door, he was at her side.  She smiled as if she had been expected him, and took his arm; and thus they left the churchyard together.  People coming after them saw them take the winding path that led down the valley towards the sea.

That was the last Zennor saw of Mathy Trewhella.  His old mother was heartbroken for a long time, but at least she had other grown children to comfort her.  The story of how Mathy disappeared with the stranger was a great mystery, often talked about, and unsolved for many years; in fact two generations had been born and grew up in the village, and old Mrs Trehwella was in her grave before news came of him.

A ship bound for Penzance, and captained by a man who knew Zennor well, came by one day and anchored off Pendower Cove; she put out a boat to get some water from the shore.  Soon a woman’s voice was heard calling urgently, “Ship!  Ship ahoy!” and the watch, looking overboard, saw a mermaid with green eyes and tawny-gold hair swimming beside them.  “Tell your captain to haul up your anchor,” she cried.  “For ‘tis lodged against the door of my home on the sea-bed, and I can’t get in to my Mathy and children.”

At this the captain came to the side and questioned her.  “Excuse me, ma’am, but did you say your Mathy?  Mathy who, may I ask?”  Sailors are always very respectful to mermaids, who have powers to cause shipwrecks and disaster, and often use them if they are annoyed.

“Mathy Trewhella, my husband, of course,” she said.  “Now haul away, if you please.”  The captain did not stay to argue, but brought up the anchor immediately.  And with a swish from her long gleaming tail she was gone, diving down to the sea-bed and her family.

So Zennor heard the news, and learned Mathy’s fate.  Neither he nor the mermaid has ever been since, but in Zennor church now is a bench end carved to show what she looked like:  long flowing hair, a sea-siren’s face, and a curved scaly tail.  And for all we know, Mathy is still down there on the ocean floor, singing sweetly to his mermaid wife and their children.
Extract from Cornish Heritage Trust.

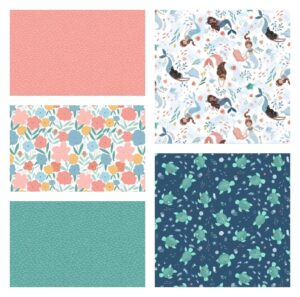
We love a Cornish folktale to inspire us & who doesn’t love a tale about mermaids!  Shell We Dance is a gorgeous range of “mermaid” themed fabrics by Lewis & Irene, perfect for a “Mermaid project”

Posted on

How Batik Fabric is Made

Batik is an Indonesian technique of wax-resist dyeing applied to the whole cloth. This technique originated from the island of Java, Indonesia.

The artist uses wax to prevent dye from penetrating the cloth, leaving “blank” areas in the dyed fabric. The process, wax resist then dye, can be repeated over and over to create complex multicolored designs. Batik is made either by drawing dots and lines of the resist with a spouted tool called a canting, or by printing the resist with a copper stamp called a cap.

Posted on

NEW ARRIVAL – Noel

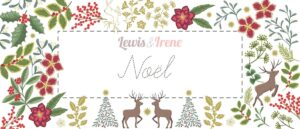
We have fallen in love with the New Arrival – Noel – from Lewis and Irene

With traditional festive colours of Reds, Greens, and Light Taupe this collection also has a little sparkle with accents of metallic gold running through the prints. We love this collection for the adorable winter characters and illustrations in the feature fabric.

Our Mary is an incredibly skilled crafter and she has designed a beautiful Painted Flowers Cushion using the Somerset Patchwork technique to create a really interesting texture. We think this cushion would look absolutely gorgeous in the Noel collection . . . especially with the sparkles!


Posted on

Liberty Mid-Summer Collection

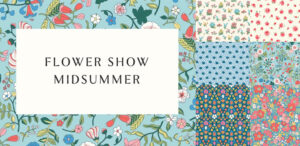
Liberties Fabrics are internationally recognised as a leader in print design and textiles. They have created original and inspiring designs since 1875, and each season the Liberty’s studio designs new original prints, adding to their vast collection of iconic florals, paisleys, graphic geometrics and colourful conersationals. This season is no different with their stunning NEW RELEASE, Mid-Summer Flower Show Collection.
With classic Liberty florals the Mid-Summer Collection is filled with beautiful roses and posies, poppies and daisies. It is a real celebration of sunshine and garden flowers, and we just love the Pinks, Blues, Greens and Creams that pour through this range. We have available Bundles, Fat 1/4s, Fabric on the bolt as well as the accompanying Wiltshire Shadow basics.

We’re really excited by this collection and have a couple of pattern projects that would be perfect for this fabric range:

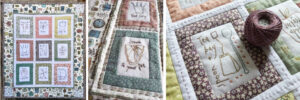
For the love of tea – A sweet little wall hanging by Hatched & Patched, with 12 stitcheries to create with tea in mind, such as Early Grey, Tea with honey, and Billy Tea, along with a tea bag and spoon.

Bunny Garden – Mrs Bunny has made friends with the prettiest of butterflies while the other naughty bunny has found a big juicy carrot to nibble on! Finished size approx. 12” x 13”