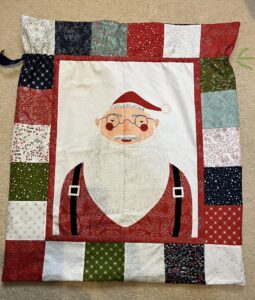
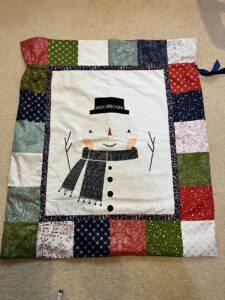
Sally has been busy making a lovely Santa Sack using two of the characters on the large character panel from the Merrymaking range 2022 which she cut down to 21″ high x 17″ wide. She added a thin border around the each panel piece for the front and back that was cut at 1 1/4″ wide, then added charm squares all around (5 charm squares down each side & 6 charm squares across the top & bottom). That finishes the front and back piece.
Cut two lining pieces 27 1/2″ wide x 31″ high. Stitch one lining piece right sides together to the top of each of the front & back pieces. Now lay your front/lining piece on top of your back/lining piece, making sure that the lining pieces are on top of each other and the front & back are on top of each other. Pin carefully making sure that the seams on the charm squares meet front & back. Sew all the way around leaving a 5″ gap in the middle of the bottom of the lining for turning & a 1″ gap on one side the in line with the top of the small border as this will be where you’ll be stitching your ribbon channel in a minute.
Turn right sides out then stitch the gap in the lining closed & push the lining into the bag. Press with an iron especially around the top of the sack.
To make the channel to feed your ribbon through, stitch through both the lining and outer pieces using the top & bottom of your small border as a guide. Using ribbon approximate 1.5m long put a safety pin in one end and feed it through the ribbon channel through the 1″ gap you left previously. Tie both ends of the ribbon together & hope that Santa will fill it with presents!