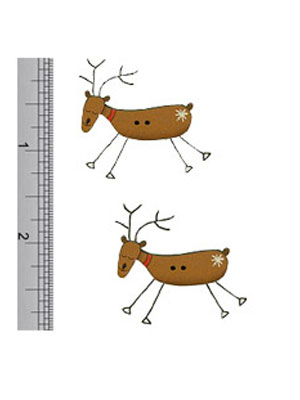
Embellish your Christmas Eve Cushion with these Cheeky hand-painted Reindeer Buttons.
Do not immerse in water.
Embellish your Christmas Eve Cushion with these Cheeky hand-painted Reindeer Buttons.
Do not immerse in water.
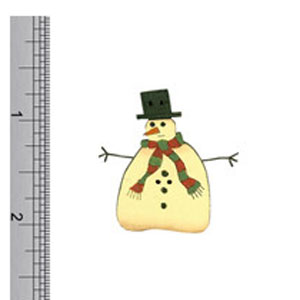
Embellish your Christmas Eve Cushion with these Cheeky hand-painted Mr Snowman Button.
Do not immerse in water.
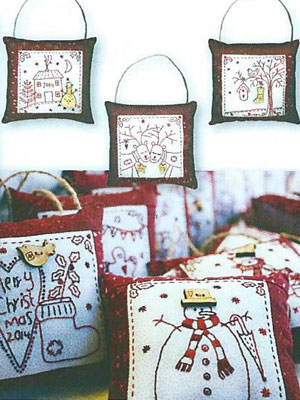
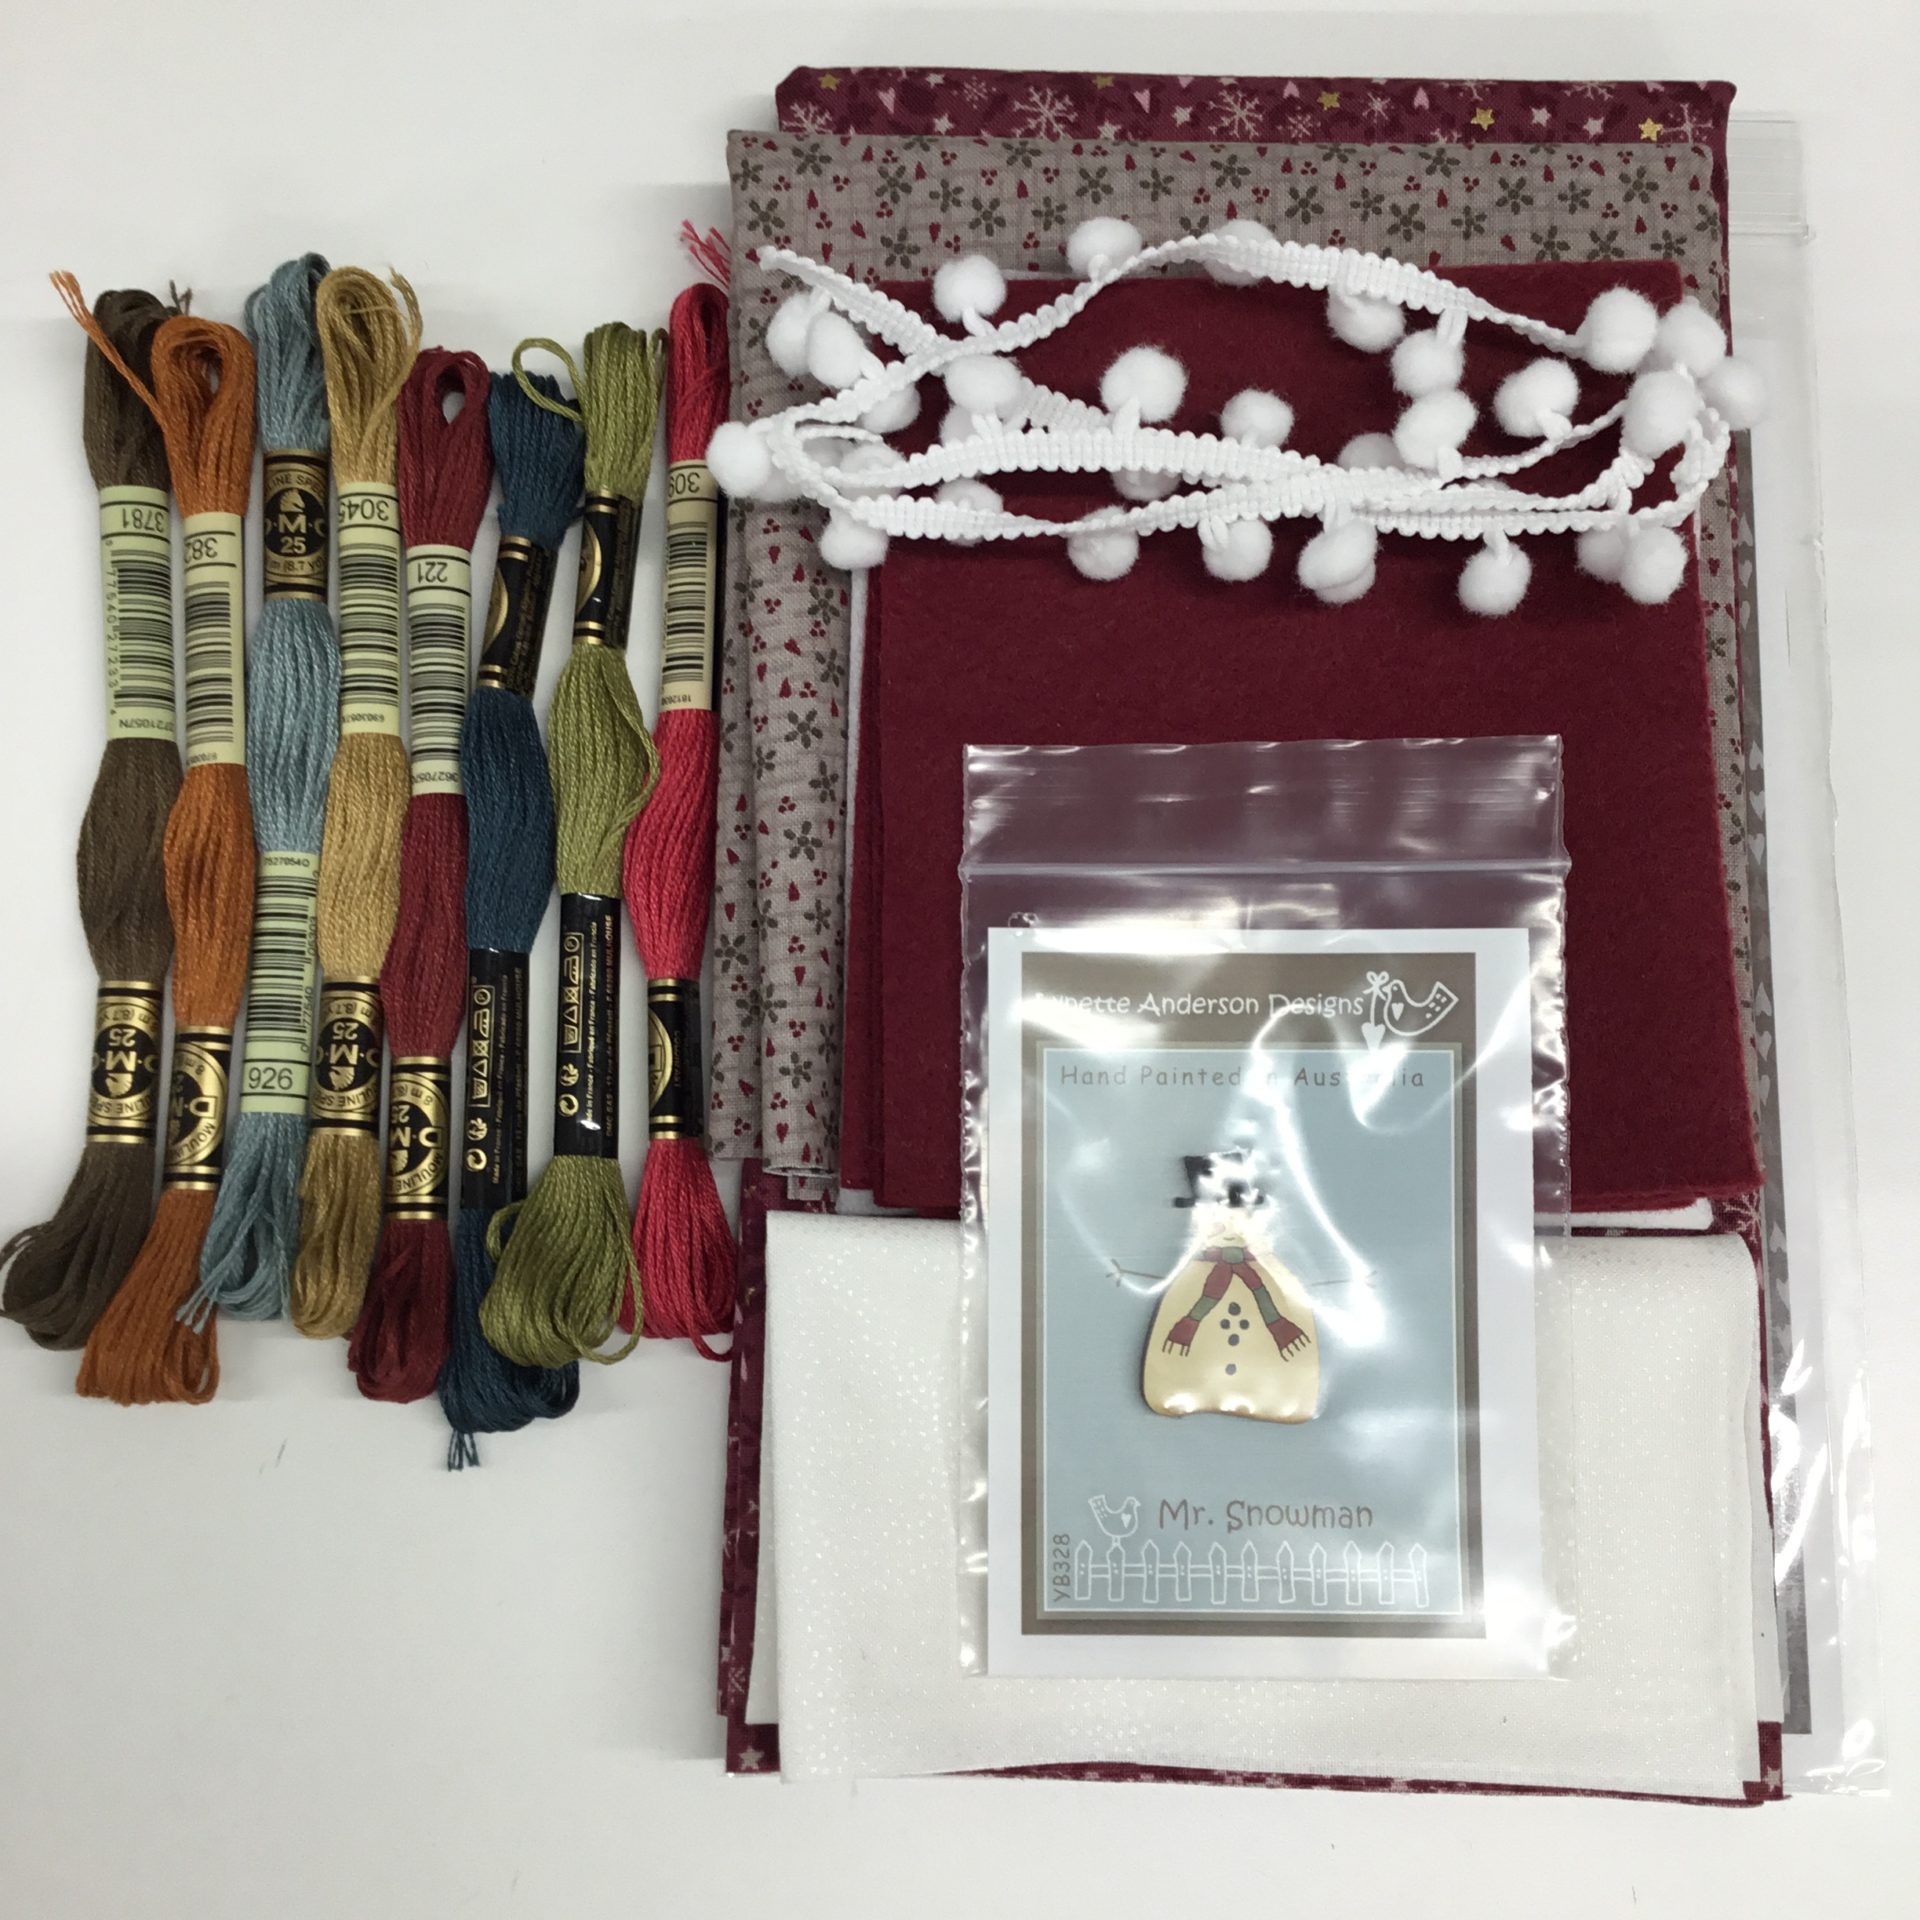
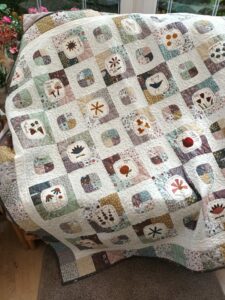
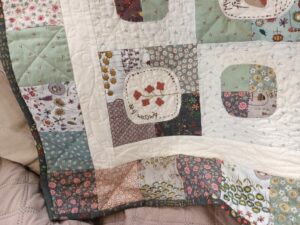
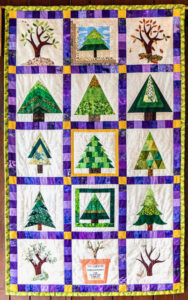
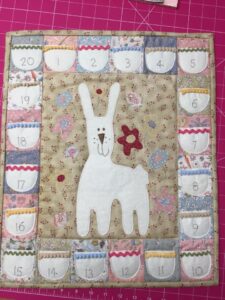
Lynette Anderson has designed these 12 beautiful Sweet Christmas Stitcheries each with a mini wooden button to decorate.
Make it into individual mini hangings or join them altogether and make a lovely wall hanging.
You can take these patterns as a block of the month, receiving 2 patterns per month for £9.50 plus p&p, or 3 per month for £14.25 plus p&p. Please email or call us to set this up.
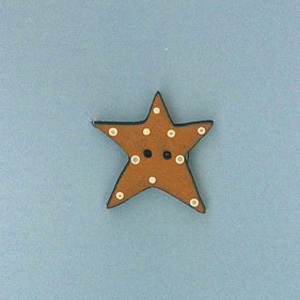
This hand painted wooden button pack has been designed from one of Lynette Anderon’s drawings.
Do not immerse buttons in water, they are for decoration only.
This button is used on the Hollyberry House pattern.

We will update this page regularly to add more photos so don’t forget to come back to check it out for inspiration. If you would like to share your creations pop in so we can photograph it or email us a clear picture and we will let the world see how fabulous you are.
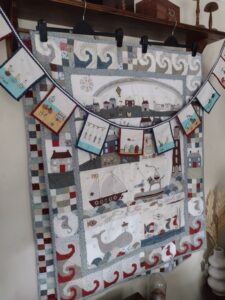
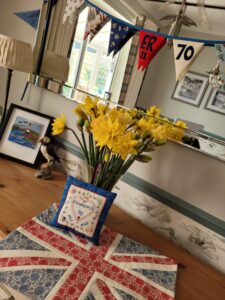
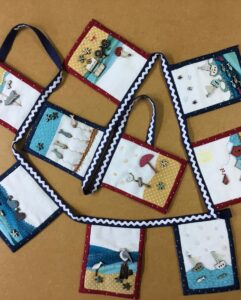
Jeanette has thanked us for inspiration and look what she has made. A beautiful seaside bunting using our wooden buttons and Seaside Town by Lynette Anderson.
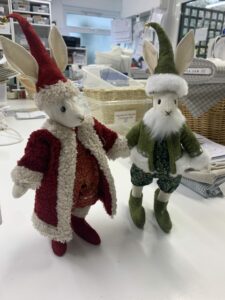
Dee made these simply amazing festive Luna Lapins. She made sure to check our bags and pockets when she left as we were very keen to keep them!

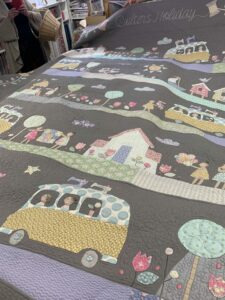
We were absolutely in awe of the stunning Tilda Quilter’s Holiday made by Julie and quilted by Sandy Chandler. Made using a kit from us following a pattern in Homespun magazine. Breathtaking work from them both.
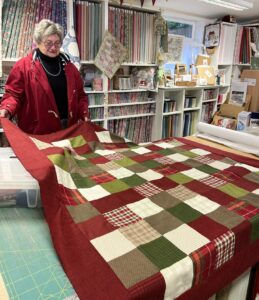
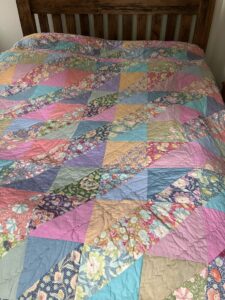
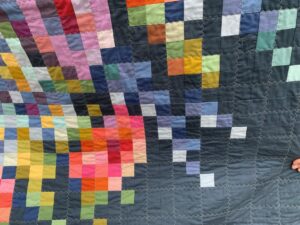
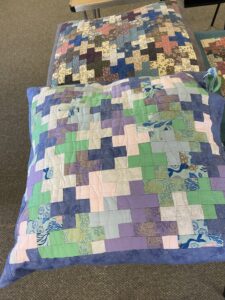
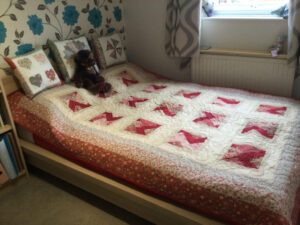
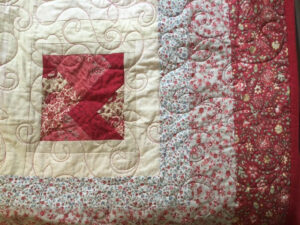
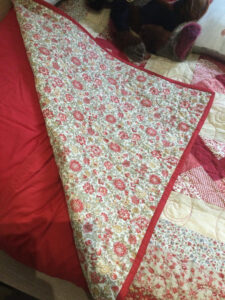
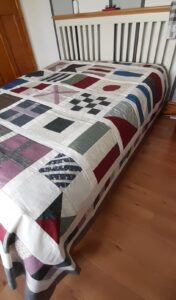
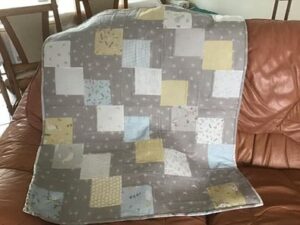
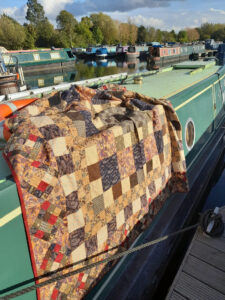
Margaret has made a simple but beautiful quilt top using a selection of flannels from the shop. We all wanted to take it home. For extra snuggle factor she is backing it with our polar fleece. When using a fleece backing you do not need wadding.
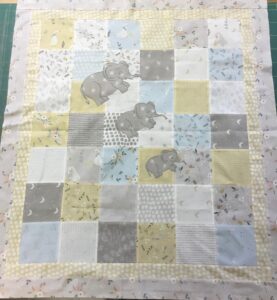
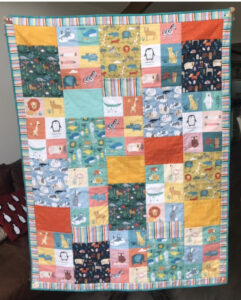
Joanna was inventive with a Heather and Sage panel and made this beautiful quilt for her grandchild.
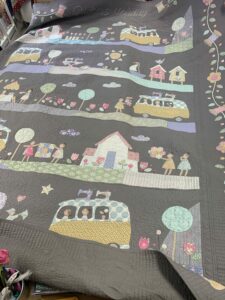
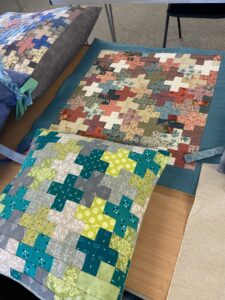
Alicia has been super productive and has made three versions of Life’s a Journey for gifts.
Which is your favourite colour way? We think it is hard to choose as they all look beautiful.
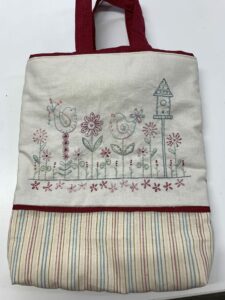
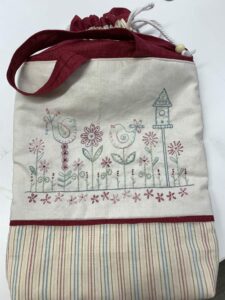
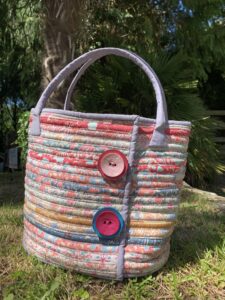
Siobhan put her own twist on the lovely Garden Gathering Bag by Gail Pan. She used a variegated thread in place of redwork to create a superb result.
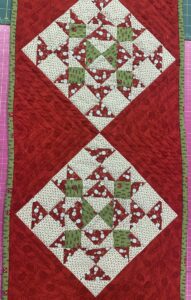
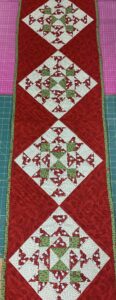
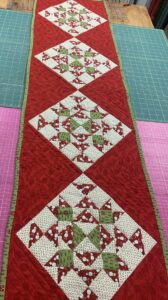
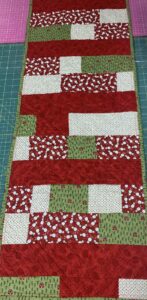
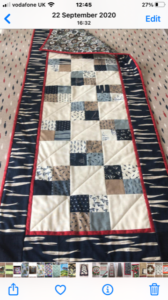
Trish has made this festive table runner using the Blizzard range of fabrics.
She made a pieced back too, lovely.
Alicia has been very busy. These two beautiful quilts brought a smile to our faces.
Heartstrings by The Birdhouse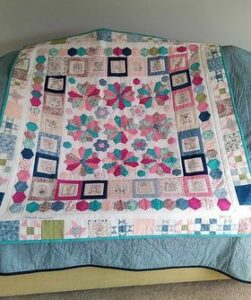 Here, There & Everywhere by Hatched and Patched made with a fabric pack from us.
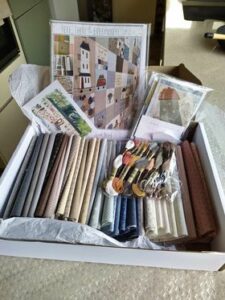
Michelle bought the Market Garden Quilt Fabric pack from us. After making it up and gifting it to her mum she is about to buy a second pack to make one for herself. We can see why. Her quilt is stunning. A blend of mainly Hatched and Patched Market Garden fabric and Lanacot Wools.
Sally plucked up the courage, after a little persuasion from us, and made the Tilda Lazy Gardener quilt using a kit from us. She is pleased with it and we think deservedly so.
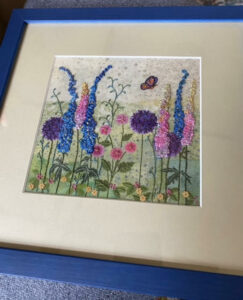
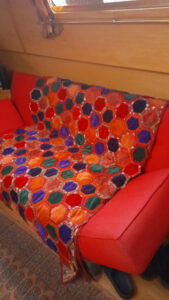
Claire made up the Cottage Garden Kit from Beaks and Bobbins. She says she has not worked with ribbon and beads before and loved the process of learning and developing new skills while she was recovering from illnesses. We love her work and the way it is displayed.

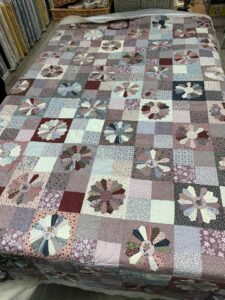
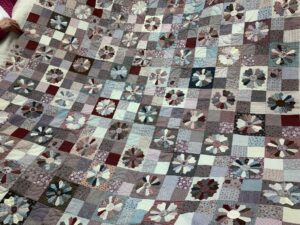
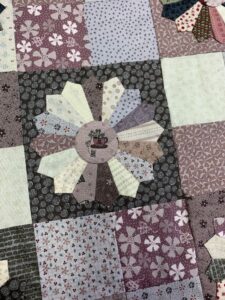
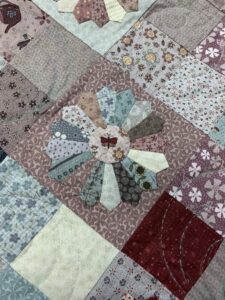
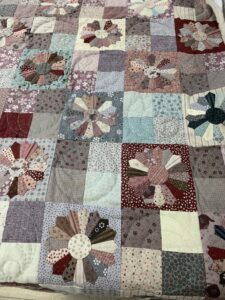
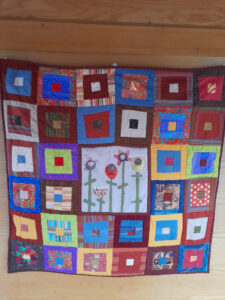
Gill made her Little Dresden Quilt entirely from Lynette Anderson scrap bags. We are in awe and love it so much. No piece of fabric is too small to be utilised!
 Lorraine designed this quilt herself using mainly Blume and Grow fabrics. Some of the blocks are by Thimble Blossom and Lori Holt. What a triumph this is.
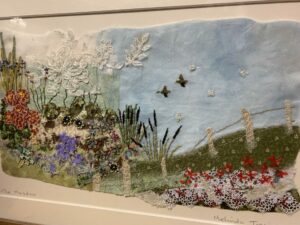
Mel showed us her absolutely stunning landscape, titled The Meadow, using fabric and lace scraps. We love her use of all the tiny bits of fabric and lace and the mix of stitch and appliqué.
Look at this lovely example of the Willowbrook Market Garden Quilt. Designed by The Birdhouse and pieced by Tess using her stash.
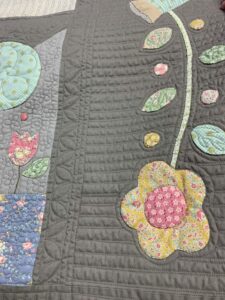
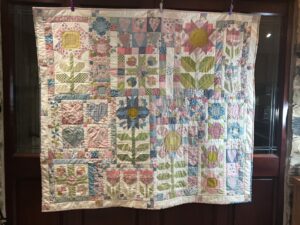
We love Tilda here at Coast and Country and look at this beautiful example of the Embroidery Flower Quilt. It is a Tilda pattern and uses Tilda Solids to give the impression of an embroidery design.
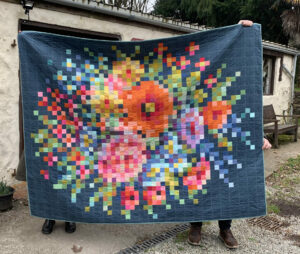
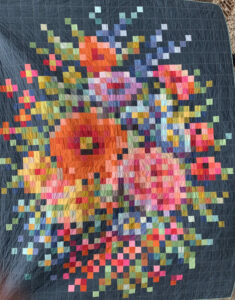
 We like the way the quilting has been done too.
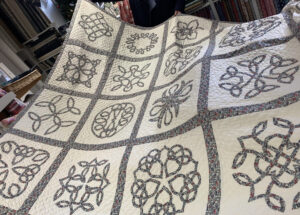
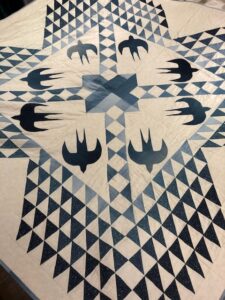
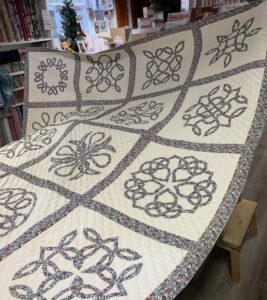 Sylvia dropped by to show us her simply gorgeous Celtic Knot quilt made using Liberty fabric. Such a lot of hard work using hand applique and hand quilting. Utterly beautiful but she says it will end up in her wardrobe. This needs to be displayed for all to see, a proper heirloom.

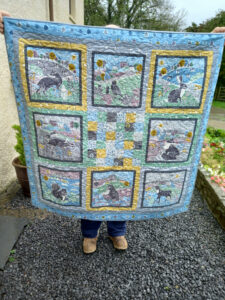
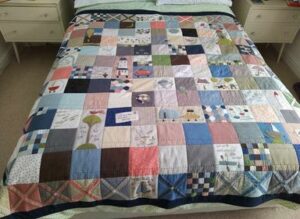
Look at this joyous photo of little Lane sat on the Seagull Quilt made by his Great Grandma Valerie in Canada using a fabric pack from us. The Seagull Quilt pattern is in the Nautical Quilts Book by Lynette Anderson. We are in love with both Lane and the quilt.

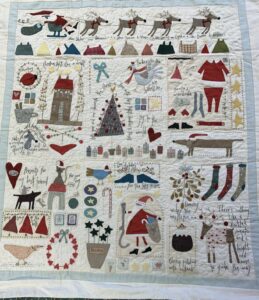


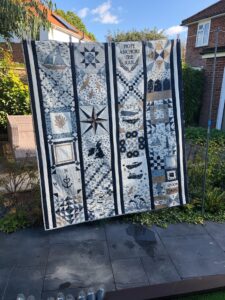
Look at this stunning version of Hatched and Patched BOM The Santa, The Tree, The Turkey and Me. Jacqueline visited us to show us what she’d created using her stash of felt and fabric scraps from our popular scrap bags. We love the original design that uses wool applique, but we adore this version too. Look for the fussy cut images and the clever use of a variegated thread for the meandering hand quilting.
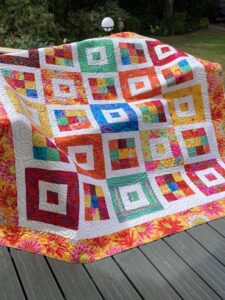
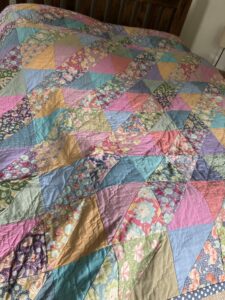
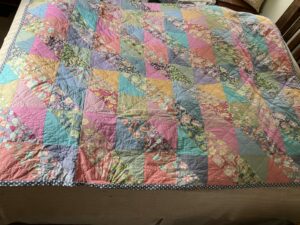
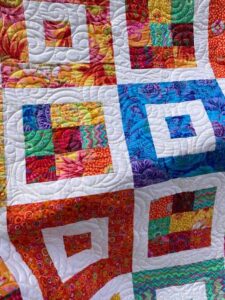 Kim showed us her deliciously colourful quilt made by combining Kaffe Fasset fabrics from a fat 1/4 bundle, with a bright white sashing. Stunning.
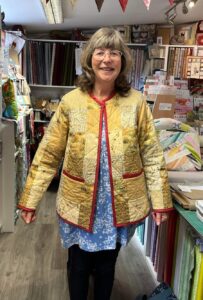
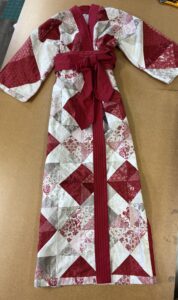
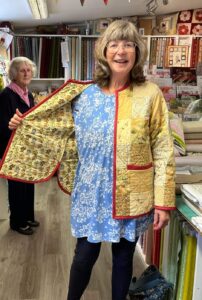 Look at Lorraine in her gorgeous patchwork jacket from the Great British Sewing Bee Book. She used a selection of our fabrics plus a quirky birdhouse end of roll bargain for the lining and a bright pop of colour for the binding. She said she went way out of her comfort zone making this but is so happy she did. We love it Lorraine.
Jill says she is a relative newcomer to quilt making but we are thoroughly impressed by her perfectly pieced Spoondrift Quilt by Janet Clare. She has used the To The Sea Fabric kit. Absolutely stunning.
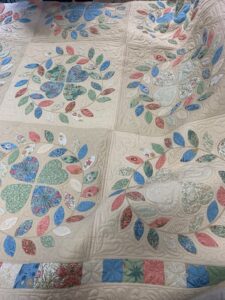
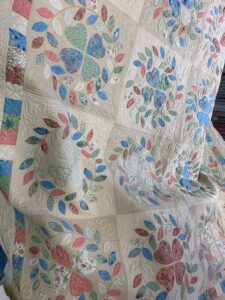
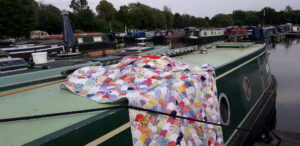
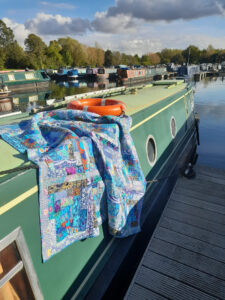
Look at this beautiful lockdown quilt from Sarah, using her stash bought in a hurry before we closed the first time. It is a gorgeous blend of needle turn applique using William Morris fabrics and superbly quilted by Sandy Chandler.
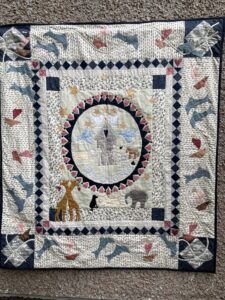
Look at this labour of love from Anne.
She made this Noah’s Ark quilt for her grandson from a Jo Colwill
pattern in the Cowslip Country Quilts Book
We were thrilled when Brenda brought in her Bluebird Quilt by Janet Clare that she’s had as a kit & was given as a gift last year, how gorgeous!


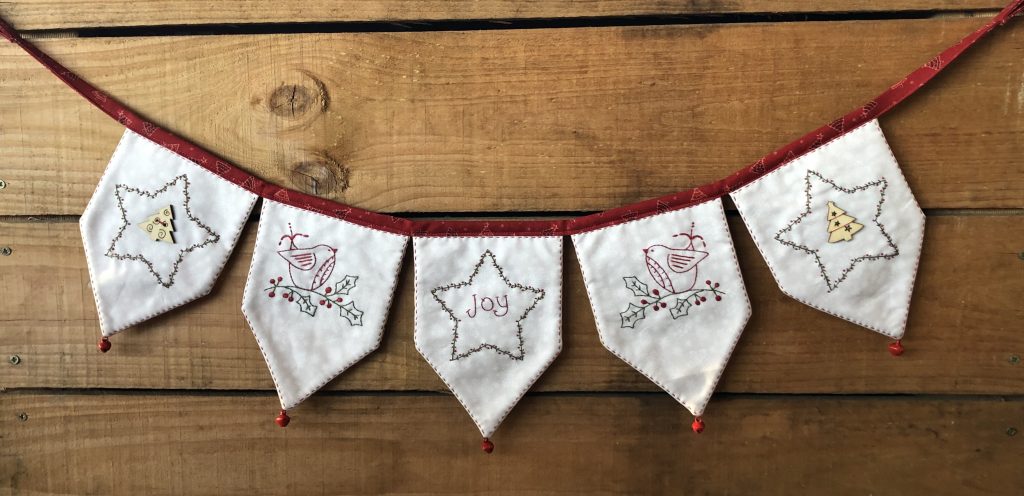
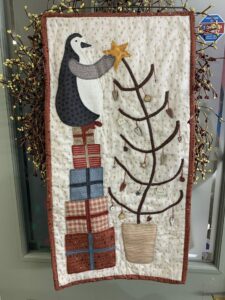
This lovely wall hanging is made from one block of Friends for Christmas by Lynette Anderson. It’s a great way of making smaller projects rather than a large quilt if you are short of space. Many Block quilts can be split into smaller sections for hangings, cushions, table runners etc, Show us your ideas and we will add them to our Customer Gallery.
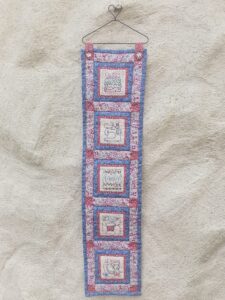
Michelle used images from the Heartstrings Pre Printed Stitchery panel to make this pretty wall hanging.
We have made up Stitchery kits using images from four of the panels so you can recreate something similar. Kits are available for Willowbrook, Heartstrings, Make Ready for Christmas and Letter to my Daughter.
Each pack contains a selection of images, DMC threads and three fat 1/16s of fabric.
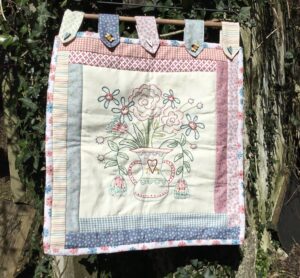 Look at this gorgeous sample using one of the images from the Blume & Grow panel from The Birdhouse. Michelle has used fabrics from the Blume & Grow range and we think it’s a delightful sunny wall hanging that could also be made into a cushion. The back is equally as pretty as it is made up of pieced strips of the fabric. The hanging is displayed on a heart top wire hanger.
Michelle has plans for the remaining images to use in bags and a block keeper. Watch this space for updates.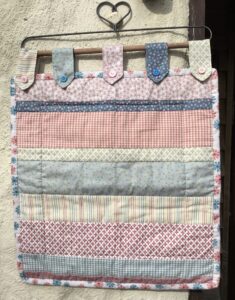
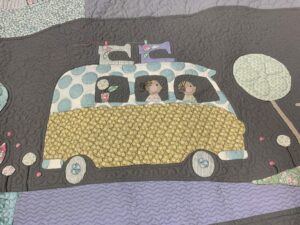
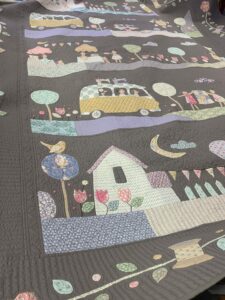
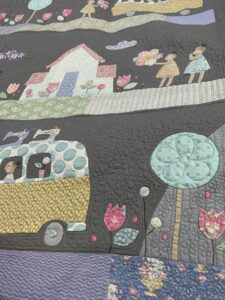
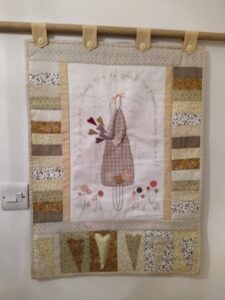
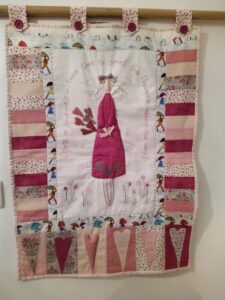
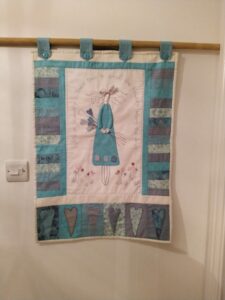
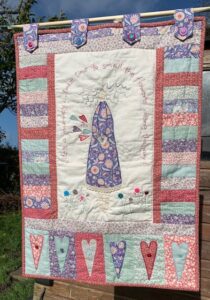
Life’s a Journey is one of our all time favourite wall hanging patterns, with the words “Life’s a journey, take time to smell the flowers along the way”, which reminds us to stop for a moment and appreciate what’s around us, whilst we rush through our busy lives.
Designed by House on the Hill, their pattern was made in earthy colours, but we also love Michelle’s version done in beautiful Tilda fabrics in blues, pinks and reds! Michelle & her friend Vicki stitched them “virtually” together, with Michelle here in Cornwall & her friend Vicki who’s overseas, & you can see their beautiful wall hangings below.
You can have fun embellishing the hearts and tabs with some of your favourite buttons from your button tin, or perhaps with a pack of our beautiful hand painted heart buttons?

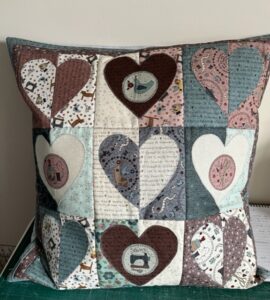
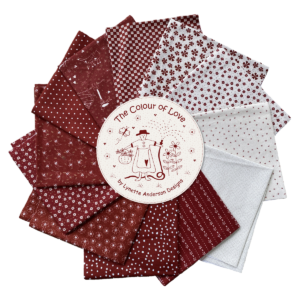
Michelle has been busy designing a new paper pieced cushion using Lynette Anderson’s new fabrics, the Colour of Love fabrics by Lynette Anderson, with the Jewel 1.5″ x 3″ paper pieces to create the heart shapes. There’s also an acrylic template available to help you cut out your pieces.
The hearts were stitched on a cream background & Michelle used our soft Sligo in Sand colour for the cushion back.
She’s added embroidery using DMC 221 & a lovely selection of wooden & shell heart buttons
You can make the cushion as long as you want, but Michelle’s is approx 40cm high x 1m long & has 1 1/2 pillows inside. Michelle’s pattern is available to purchase here

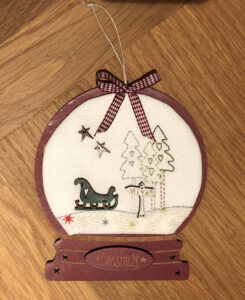
I have used the Snowglobes & a pack of hand painted wooden buttons that we stock to create a beautiful Christmas decoration.
you will need:
Snowglobe
Button pack
paper
pencil
compass
Micron or Frixon pen or similar
6” square wadding
6” light weight iron on Vilene
6” square of background fabric
3″ x 6″ piece of fabric to represent snow on the ground (if you’re doing the same button pack as I used)
6” square bondaweb (optional)
6” square card (mount board or two pieces of cereal packet card)
lightbox (optional)
Pritt Stick glue or similar
Sewline Fabric Glue Pen
25cm Ribbon (optional)
1. Using a compass, measure 2 1/4” from the compass point to the pencil & draw a circle onto plain paper. Cut it out then lay it onto your Snowglobe & fold the bottom of the paper up slightly to match the shape on the snowglobe. Cut the folded bit off. You now have a template for your finished stitchery size.
2. Choose a suitable pack of buttons (I used the Sleigh, Stars & Sign button pack). Open the pack & carefully remove the buttons, taking care not to spoil the button pack background design. Lay your template over the button pack background design & position until the design fits centrally on your template piece. (You may need a light box or put your papers against a window to see through it. Trace the design in pen.

3. Cut a piece of background fabric 6” square & iron a piece of light weight iron Vilene onto the reverse of the fabric. Now centre your fabric over the design & trace the design onto your fabric using a Micron or Frixon pen.
4. Stitch the outline of the design you’ve traced to achieve a similar look to the design on your chosen button pack. Use your imagination & include sparkly threads where appropriate or bondawebbed fabric if required (don’t forget you need to reverse any design you bondaweb). (The drawn circle was larger than the template so it won’t show on the finished ornament).

5. When you’ve finished sew your buttons in place. Cut a piece of wadding & a piece of card the same size & shape as you paper template (two pieces a cereal packet card glued together is strong enough). Use Pritt Stick to glue the wadding onto the card. Cut out your finished stitched design 1/2” larger all the way around than your paper template. Now position your stitchery design over the wadding & card pieces so it’s centred. Keeping it in place, carefully turn it over and using your Sewline Fabric Glue pen, glue around the outside and stick the fabric to the back of the card so it’s nice and taught.

6. When this is dry, glue your design to the centre of the snowglobe & I also added a bow to the bottom of the loop of string it hangs by.
Why not make them as gifts for friends and family!